The belief that a maritime rescue is a single, free event is a dangerous illusion; the reality is a high-stakes handover that can lead to financial ruin.
- Search and Rescue (SAR) to locate you is often a public, state-funded service. Medical Evacuation (Medevac) to transport you is typically a private, commercial service that triggers catastrophic costs.
- The total bill is a “cost cascade”—helicopter, ER, hyperbaric chamber, repatriation—that can easily exceed six figures for a serious diving incident.
Recommendation: Audit your insurance policy immediately. You must confirm it explicitly covers the full chain of “medical evacuation” and “repatriation,” not just “rescue.”
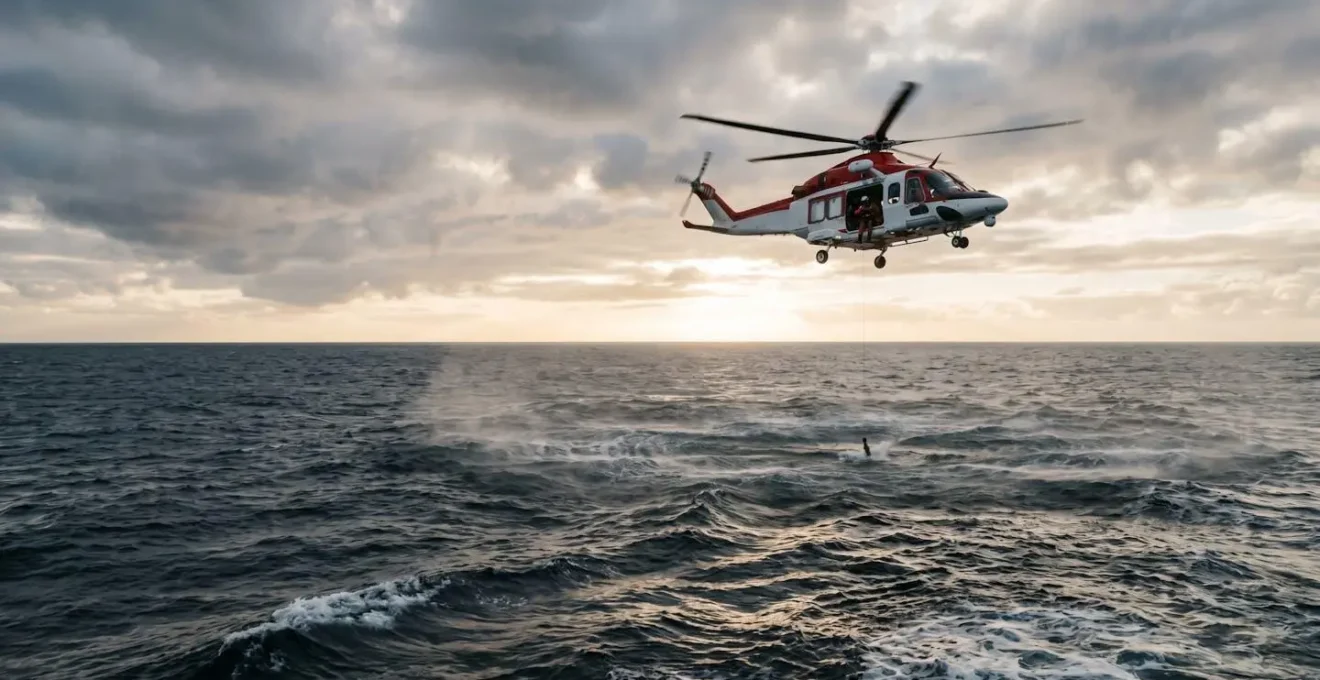
The call comes in over the headset. A diver in distress, 30 miles offshore. From my seat, the world shrinks to two things: the clock and the fuel gauge. Down below, you’re hurt, scared, and waiting for the sound of my rotors. You believe the cavalry is coming. You’re not wrong, but you’re not entirely right, either.
You’ve been told to get insurance. You’ve been told to carry a VHF radio and a personal locator beacon. You think you’re prepared. But what no one tells you about is “The Handoff”—the precise, critical moment my state-funded search and rescue mission ends and a private, potentially six-figure medical bill begins. That’s the moment that can ruin your life long after I’ve saved it. The air is thick with salt and urgency, but also with financial liability you can’t even fathom.
This isn’t a guide to picking a dive computer. This is a look inside the cockpit during a crisis. We’re going to bypass the sales pitches and break down the brutal mechanics of a maritime medevac. We’ll examine the real costs, the life-or-death decisions that get made in seconds, and what you *actually* need to know before you ever step off the boat again. Pay attention. This is the briefing you never got.
To fully grasp the stakes, it’s essential to understand every stage of the process, from the initial decision to launch to the final bill that lands on your doorstep. This guide breaks down the operational and financial reality of a maritime medical evacuation.
Summary: Medical Evacuation from Sea: Who Pays for the Helicopter Rescue?
- When Does Maritime Rescue Decide to Launch the Helicopter vs Fast Boat?
- Why a 1-Hour Rescue Mission Can Cost €3,000+?
- VHF Channel 16:Tenerife vs Lanzarote: Which Island Offers Better Technical Diving Infrastructure?
- How to Prepare a DCS Victim for Winch Extraction from a Boat?
- Does Your Evacuation Insurance Cover Your Buddy or Partner Too?
- Where is the Nearest Hyperbaric Chamber to Tenerife South?
- Life Vest vs Buoyancy Aid: Which Is Mandatory for Cliffs Excursions?
- The Cost of Decompression Illness: Why You Never Want to Pay for a Chamber Ride Out of Pocket?
When Does Maritime Rescue Decide to Launch the Helicopter vs Fast Boat?
The first thing you need to understand is that “calling for help” doesn’t automatically mean you get a helicopter. When your Mayday call hits the Maritime Rescue Coordination Centre (MRCC), they aren’t just looking at your position; they’re running a complex calculation I call the Asset Selection Matrix. Is the patient stable? What’s the weather on scene? How far are you from a capable port? The choice between a high-speed boat and a helicopter is a trade-off between speed, capability, and operational limits.
A fast rescue boat might seem like the simple answer, but it’s slow compared to an aircraft and can be useless in coastal areas with shallow water or heavy vegetation. A helicopter is fast and can access almost any location, but it’s grounded by high winds or severe precipitation. This isn’t a guess; it’s a strategic decision. As a pilot, I don’t launch unless the coordinator determines my aircraft is the right tool for that specific job, at that specific time.
This complex decision-making process was highlighted in a research project comparing different rescue assets. The study found that while helicopters are exceptionally fast, they have clear operational vulnerabilities. It noted that fixed-wing UAVs could reach sites faster than boats and operate in winds unsafe for helicopters, demonstrating the intricate matrix of choices rescue coordinators must navigate. This complexity is the first link in a chain that leads to high costs and variable response times. You don’t get to choose your rescue vehicle; the situation dictates it.
Ultimately, the decision is based on a single goal: getting the right medical capability to the victim within the golden hour, and that decision sets the entire cost cascade in motion.
Why a 1-Hour Rescue Mission Can Cost €3,000+?
Let’s get one thing straight: €3,000 is a conservative starting point. The numbers are staggering because a rescue helicopter isn’t a taxi. It’s a flying intensive care unit, and the meter is always running, even when it’s sitting on the tarmac. The cost begins with 24/7 readiness: pilots, medics, mechanics, and support staff all on standby. My salary, my training, the hangar, the insurance on the aircraft—it’s all part of the hourly operational cost before the skids even lift.
Then comes the mission itself. The aircraft is burning massive amounts of specialized fuel, every component is life-limited and eye-wateringly expensive to replace, and a multi-person crew is operating in a high-risk environment. Official figures often seem abstract until you see the breakdown. For instance, according to official Coast Guard operational cost data, a simple HH-60 helicopter flight can cost $6,530 per hour.
Many divers are shocked to learn that fuel is only a fraction of this total. It’s a visible, easy-to-understand expense, but it’s just the tip of the iceberg. The real costs are hidden in the maintenance logs, the crew training schedules, and the insurance premiums for the multi-million-dollar aircraft.
The table below, based on an analysis of helicopter operational capabilities, shows just the fuel costs for common search-and-rescue (SAR) models. Remember, this is *only* the fuel.
| Helicopter Model | Fuel Consumption | Fuel Cost per Hour (€3/gallon) |
|---|---|---|
| AW139 (Medium SAR) | 150 gallons/hour | €450 |
| H225 (Large SAR) | 215 gallons/hour | €650 |
| S92 (Large SAR) | 215 gallons/hour | €650 |
| Note: Fuel costs represent only one variable component of total operational expenses, excluding crew salaries, insurance, maintenance, and 24/7 standby operations | ||
As you can see, the machinery is as complex as it is expensive. Every switch, every gauge, every hydraulic line represents thousands of hours of engineering and maintenance. This is what you’re paying for: not just an hour of flight time, but the entire infrastructure of safety and readiness that makes that flight possible.
When you see my helicopter on the horizon, don’t just see a rescue. See a complex, resource-intensive system deployed for one purpose: to save your life. And that level of readiness has a price.
VHF Channel 16:Tenerife vs Lanzarote: Which Island Offers Better Technical Diving Infrastructure?
This question is a trap. You’re asking the wrong thing. Pitting islands against each other for “better” infrastructure is a diver’s debate, not a survival calculation. The only question that matters in an emergency is: is there a functional, staffed, 24/7 hyperbaric chamber that can treat me right now? Your assumption that a chamber listed in a dive guide is operational is one of the most dangerous mistakes you can make.
Let’s use the Canary Islands as a real-world example. A decade-long study of diving injuries in the region revealed a critical reality: the single, primary treatment facility is the Hyperbaric Medicine Unit at the University Hospital (HUC) in Santa Cruz, Tenerife. This one facility serves the entire Macaronesia region. It’s not about which island is “better”; it’s about knowing where the one critical asset is and its current status.
The same study highlighted another alarming fact: in 18% of the diving injury cases, the victim either had no certification or that information was not recorded. This paints a picture of the chaos on the ground. Emergencies happen to everyone, prepared or not. The difference is that the prepared diver has already verified the operational status of the local chamber before even getting their gear wet. They aren’t asking “which island is better”; they are asking “what is the direct phone number for the HUC chamber, and who is the hyperbaric physician on call today?” That is the mindset of a survivor.
Your emergency plan should not be a vague notion of “getting to a hospital.” It must be a specific, verified plan that includes the name, location, and contact information for the nearest *capable* treatment facility.
How to Prepare a DCS Victim for Winch Extraction from a Boat?
When my helicopter is hovering 100 feet above your boat, it’s the worst possible time for you to learn a new skill. The noise is deafening, the rotor wash is a hurricane, and the situation is life-or-death. Your ability to efficiently prepare the victim and the deck for my arrival can literally be the difference between a smooth extraction and a disaster. We are a team, whether you like it or not, and you need to know your role.
As a maritime expert from Mintra aptly puts it, the process requires immense skill from my crew, but your role is just as vital. They note:
A medevac by winch method is a very complex operation which requires a great deal of skill from the aircrew. It’s really important that seafarers play their role effectively and work with the helicopter crew to achieve the best outcome.
– Maritime subject matter expert, Mintra Maritime Training Insights
This isn’t theory. This is a critical drill. If you are operating a boat offshore, every person on board needs to be briefed on these steps. The deck must be cleared of anything that can fly up into my rotors—coolers, hats, loose towels. One person, and one person only, should be designated to communicate with me on the VHF. The victim should be packaged and ready, with their documents and medical info in a waterproof bag, ready to go.
Your boat deck needs to look like this: clear, organized, and ready. Every second wasted on deck is a second lost in the golden hour, and a second closer to a negative outcome for the patient.
Your Pre-Extraction Action Plan
- Suit Up: Ensure the entire deck party wears gloves, lifejackets, and appropriate personal protective equipment (PPE). No exceptions.
- Ground the Wire: Allow the winch wire to touch the ship or water *first* before anyone on deck touches it. This grounds the static electricity built up by the helicopter and prevents a severe shock.
- Manage the Hi-Line: Use the tag line (Hi-Line) correctly to control the swing of the hoisting line, especially in rough seas. Do not wrap it around your hand.
- Brief the Team: Everyone on deck must know their role, how to handle the lines, and stay out of the way. Brief them *before* the helicopter arrives.
- Docs Ready: Have the patient’s passport and a summary of their medical condition (dive profile, symptoms, timeline) ready for immediate handover to the winchman.
- Single Point of Contact: Designate one person to be the sole communicator with the helicopter crew via VHF radio. This prevents confusion.
Executing these steps correctly tells me I’m dealing with professionals. It builds trust and makes the entire high-risk operation safer and faster for everyone involved.
Does Your Evacuation Insurance Cover Your Buddy or Partner Too?
This is where the financial nightmare truly begins. You have insurance. You paid your premium. You think you’re covered. But the most critical distinction in emergency services is one most people learn too late: SAR is free, Medevac costs. This isn’t a slogan; it’s the financial guillotine that separates a scary story from a life-altering debt.
Here’s “The Handoff” in action, as documented in backcountry rescue operations which mirror the maritime world. A public agency, like the Coast Guard or a state SAR team, may use its resources to search for and locate you at no direct cost. But the moment you are deemed a “patient” and require medical transport to a hospital, the operation often transitions. My helicopter, or a contracted air ambulance, becomes a private medical transport service. The mission switches from “rescue” to “medevac,” and the billing starts immediately. The case study reveals this triggers bills of $30,000 or more. It’s a commercial transaction, not a public service.
This is why simply “having insurance” is meaningless. Your policy might cover “rescue,” but a clever underwriter can argue that the costly part was “medical transport.” The gap between what you are billed and what your insurance pays can be enormous. For example, documented wilderness medical evacuation billing shows a case where a victim was billed $65,000, while their insurance company only paid out $9,000. Who pays the remaining $56,000? You do. And what about your buddy? Insurance is almost always individual. If they aren’t on your specific family plan, they are on their own. Their rescue becomes their financial burden.
Before your next trip, you must call your insurance provider and ask one question: “Does my policy cover 100% of the costs for medical evacuation by helicopter from a remote maritime location to a hospital, and what is the maximum payout limit?” If they can’t give you a straight, confident “yes,” you are not covered.
Where is the Nearest Hyperbaric Chamber to Tenerife South?
The nearest chamber is at the Hospital Universitario Nuestra Señora de Candelaria (HUC) in Santa Cruz. But if that’s the only thing you know, you are dangerously unprepared. The physical location is the least important piece of the puzzle. The right question isn’t “where is it?” but “is it a viable option for me, right now, in an emergency?”
A chamber can be down for maintenance. Its specialized staff could be unavailable. It might be a monoplace chamber, which is useless if the patient is unstable and needs a medic inside with them. As a remote diver, you are not just a tourist; you are an expedition leader. You must conduct your own intelligence gathering before you even book your flight. Verifying the viability of the local hyperbaric infrastructure is as important as checking the weather.
Your pre-dive checklist should include a dedicated section for emergency medical logistics. You wouldn’t dive without checking your air pressure; you shouldn’t dive remote without verifying your exit strategy. The following list is not a suggestion; it’s your new standard operating procedure.
Hyperbaric Chamber Viability Checklist
- Confirm Location: Verify the primary chamber’s address and name (e.g., HUC in Santa Cruz for the Canaries).
- Verify 24/7 Status: Call ahead or have a local contact confirm the chamber is fully operational and staffed around the clock.
- Check Chamber Type: Ask if the chamber is multi-place (allowing staff inside) or monoplace. This is critical for severe cases.
- Confirm Treatment Capability: Specifically ask if they can and regularly do treat divers using US Navy Treatment Table 6 protocols for severe DCS.
- Physician Availability: Confirm that a qualified hyperbaric physician is on-site or on-call and can be there within a reasonable time.
- Save Emergency Contacts: Pre-load your phone with the chamber’s direct number, the local MRCC, and the DAN emergency hotline.
- Check Local Intel: Ask your local dive operator about the chamber’s recent operational status. Have they sent a diver there lately? How did it go?
Failing to do this homework means you’re not just diving without a plan; you’re diving with a fantasy. In my line of work, fantasies get people killed.
Life Vest vs Buoyancy Aid: Which Is Mandatory for Cliffs Excursions?
From 1,000 feet up, with the sun glaring off the water, the ocean is a massive, confusing mess of waves and shadows. I’m not looking for a person; I’m looking for a *signal*. I’m looking for something that screams “I AM HERE AND I AM IN TROUBLE.” Your choice of personal flotation device (PFD) is that signal. And most divers are choosing the wrong one.
A dark-colored buoyancy aid or a wetsuit without a PFD makes you functionally invisible. You blend in with the shadows, the seaweed, the chop. You are a needle in a 100-square-mile haystack. A proper life vest, on the other hand, is a tool designed for one purpose: to get you found.
This isn’t a matter of opinion; it’s a core principle of search and rescue operations. As one analysis on maritime safety bluntly states, it’s all about increasing your “findability.”
A proper life vest (bright color, SOLAS tape, whistle, light attachment point) is a tool that dramatically increases ‘findability’, while a dark-colored buoyancy aid makes the victim nearly invisible in choppy water.
– Search and Rescue Operations Analysis, Maritime Safety Perspective on Personal Flotation Devices
For any activity near cliffs, in open water, or in any situation where you could become separated from your boat or the shore, the choice is not a choice. A high-visibility life vest is mandatory from a survival perspective, regardless of local regulations. It’s not about buoyancy alone; it’s about being a target I can see from half a mile away.
When I’m searching, give me a fighting chance to find you. Wear the brightest, most reflective piece of equipment you can. Your life depends on it.
Key Takeaways
- The “Handoff” from free, public Search and Rescue (SAR) to costly, private Medical Evacuation (Medevac) is the single most critical and misunderstood financial event in a maritime emergency.
- A rescue’s cost is a “cost cascade”—helicopter, ER, hyperbaric chamber, repatriation—that can easily exceed $100,000 for a single serious diving incident.
- Your survival plan must prioritize “findability” (e.g., a proper life vest) and pre-verified emergency infrastructure, not just the appeal of a remote dive site.
The Cost of Decompression Illness: Why You Never Want to Pay for a Chamber Ride Out of Pocket?
We’ve talked about the helicopter, but that’s just the first, most dramatic bill. The real financial devastation of a serious diving injury like decompression illness (DCI) is a “cost cascade”—a relentless series of bills that can follow you for months or even years. Paying for this out of pocket is not an option; it’s financial suicide. These events are not rare; according to UK government official rescue statistics, 1,598 civilian SARH taskings were recorded in just six months in 2022 alone. Your emergency could be next.
Let’s be clear about what you’re facing. The evacuation is just the beginning. The real treatment for DCI happens on shore, and it is incredibly specialized and expensive. The total invoice for a single serious incident is a composite of many different services, each with a high price tag.
The documented reality from organizations like Global Rescue confirms that medical evacuation costs can reach six figures unless you have a comprehensive plan. They’ve coordinated emergencies where the total bill for the rescue, transport, and specialized medical care exceeded $100,000. This is the number you need to have in your head when you review your insurance policy. This is the real-world cost of a worst-case scenario. It is a sum that can bankrupt a family, force the sale of a home, and alter your life forever.
- Initial helicopter or boat evacuation from the dive site.
- Emergency room diagnostics, including MRI and CT scans to assess neurological damage.
- Multiple hyperbaric treatment sessions, often starting with a lengthy US Navy Table 6.
- ICU or multi-day hospital stay for monitoring.
- Fees for specialized neurologists and diving medicine physicians.
- Medical repatriation with a qualified escort if the injury occurs abroad.
- Lost wages during a potentially long recovery.
- Ongoing physical therapy and long-term disability costs.
Your next step isn’t to buy a new piece of gear. It’s to pull out your insurance policy and your emergency plan and audit them against the brutal realities we’ve just covered. Verify your coverage for the full cost cascade. Do it before you even think about your next dive. That’s an order.