Yes, a beginner can learn to kitesurf in El Médano, but only by treating it like a professional training ground, not a casual beach holiday.
- The spot’s famous strong winds are a challenge that forges highly competent kiters when managed with the right instruction and gear.
- Success depends less on athletic ability and more on strategic choices: picking a certified school, timing your visit, and understanding the bay’s unique dynamics.
Recommendation: Focus on finding a high-quality IKO-certified school first; they are your key to safely unlocking this world-class but demanding location.
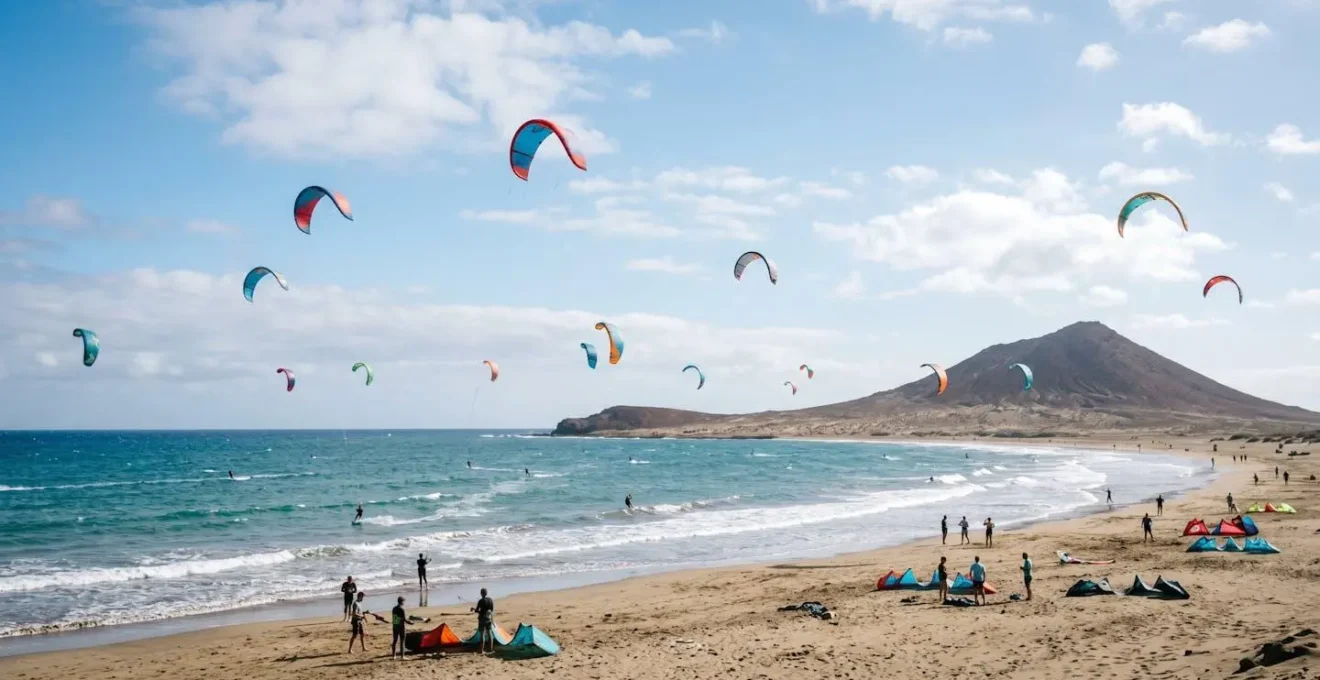
You see them from the beach promenade in El Médano: a flurry of colourful kites dancing against the backdrop of Montaña Roja. It looks exhilarating, powerful, and maybe a little intimidating. You’re athletic, you’re curious, but the sheer speed and number of riders make you ask the crucial question: is this place just for pros, or could I actually learn to kitesurf here? The common answer is often a simple “yes, it’s windy” or a vague “take lessons.” But this advice misses the point. El Médano’s reputation as a world-class wind-sport destination is built on conditions that can be unforgiving for the unprepared.
As a certified IKO (International Kiteboarding Organization) instructor, I’ve seen countless aspiring kiters face this exact dilemma. They are drawn by the energy but rightly concerned about the power. The truth is, El Médano is not just *suitable* for beginners; it can be an exceptional place to build a rock-solid foundation in the sport. However, this comes with a critical condition: you cannot approach it casually. Success here is born from a professional mindset, focusing on strategic preparation and environmental awareness from your very first lesson. It’s about understanding *why* the wind is so good, how to choose a guide to navigate it, and how to become a safe, responsible member of this bustling aquatic community.
This guide moves beyond the generic advice. We will break down the specific challenges and opportunities El Médano presents to a beginner. We will explore the science behind its legendary wind, detail how to select a school that prioritizes your safety, and provide the strategies you need to manage the crowds and conditions. By the end, you won’t just know if you *can* learn here; you’ll have a clear roadmap on *how* to do it safely and effectively.
Summary: Your Guide to Kitesurfing in El Médano as a Beginner
- Why the Trade Winds Make El Médano a World-Class Kite Spot?
- How to Choose an IKO Certified School for Safe Lessons?
- Kite Sizes: What Will You Need for Strong Canary Winds?
- The Risk of Collisions in Crowded Bays and How to Avoid Them
- When to Book Lessons for Consistent But Manageable Wind?
- Where to Go When El Médano Is Too Crowded for Your Skill Level?
- Why Your Lake Experience Doesn’t Translate Directly to Ocean Sailing?
- Navigating El Médano Bay: The Right-of-Way Rules Every Kiter and Windsurfer Must Know
Why the Trade Winds Make El Médano a World-Class Kite Spot?
The first thing you need to understand about El Médano is that its wind is not an accident; it’s a product of geography and meteorology. The Canary Islands are blessed with the “alisios,” or trade winds, which provide remarkable consistency. In El Médano, this is amplified. The spot benefits from a local acceleration or “Venturi effect,” where the wind is funnelled and squeezed between Montaña Roja and Montaña Pelada, picking up speed as it hits the bay. This geographical feature is the engine that powers the spot.
This natural wind machine delivers an incredible number of rideable days. Local wind statistics confirm there are over 250 sailable days per year, a level of reliability that few places in the world can match. For a beginner, this consistency is a huge advantage. It means you can book a week of lessons with a high degree of confidence that you will have the conditions needed to progress every day. The wind typically blows at a steady 20 to 25 knots, which is strong, but its stability makes it predictable and therefore manageable with the right instruction and equipment.
Learning in these conditions means you develop “wind literacy” faster. You quickly learn to respect the power of the kite and master control in what would be considered advanced conditions elsewhere. While challenging, this builds a solid foundation, making you a more capable and confident kiter wherever you travel next.
How to Choose an IKO Certified School for Safe Lessons?
In a high-wind spot like El Médano, your choice of kitesurfing school is the single most important decision you will make. It’s the difference between a frustrating, potentially dangerous experience and a safe, empowering one. Not all schools are created equal. The gold standard to look for is affiliation with the International Kiteboarding Organization (IKO). An IKO Center isn’t just a label; it’s a guarantee that the school adheres to a global framework of safety protocols and teaching methodologies developed over decades.
The IKO’s system is built on the principle of progressive mastery. Instructors are trained to break down complex skills into small, manageable steps, ensuring you never advance to the next level until you’ve demonstrated full competency at your current one. This structured approach is crucial in El Médano, where the strong wind leaves little room for error. A certified school will prioritize your safety above all else, using up-to-date equipment with reliable safety systems, providing radio helmets for clear communication on the water, and having strict protocols for conditions that are too extreme for beginners.
Your Pre-Booking Checklist for a Kitesurfing School
- Ask about the student-to-instructor ratio: An IKO-certified school should maintain a maximum of 2 students per instructor on the water for beginners to ensure personalized attention and safety.
- Verify communication systems: Confirm if they use two-way radio helmets (like BB-Talkin systems), which are essential for real-time coaching and safety in windy conditions.
- Inquire about wind protocols: Ask what their policy is for beginner lessons on days when the wind exceeds 30 knots. A responsible school will reschedule or offer alternative activities.
- Check the safety equipment provided: Ensure the course includes modern, well-maintained helmets, impact vests, and kites with quick-release systems that have been recently inspected.
- Inspect their gear quality: Ask if their kites are recent models. Newer kites have more reliable, user-friendly, and IKO-approved safety features.
Don’t be afraid to ask these questions before booking. A professional, safety-conscious school will welcome your diligence and be happy to show you their certifications and explain their procedures. This is your first strategic choice, and getting it right sets the stage for everything that follows.
Kite Sizes: What Will You Need for Strong Canary Winds?
One of the first things beginners learn is that the kite is your engine, and you must always match the size of your engine to the conditions. In a place with powerful winds like El Médano, this is non-negotiable. Using a kite that is too large for the wind is the most common and dangerous mistake a novice can make. The good news is that your IKO school will handle this for you, selecting the appropriate kite size for your weight, skill level, and the day’s specific wind speed.
However, understanding *why* they hand you a small 7m kite instead of a 12m one is a key part of your “wind literacy.” In the 20-25 knot winds typical of El Médano, a smaller kite is necessary to keep the power manageable. A smaller surface area catches less wind, generating less pull and allowing you to maintain control. As an instructor, I often hear the question, “How long will it take me to learn?” While it varies for everyone, a useful benchmark comes from the Club Canary Kitesurfing Instructors, who note that most beginners take approximately 12-15 hours of lessons to gain confidence. During this time, you will likely use several different kite sizes as you progress and as the wind fluctuates.
To give you a clearer picture, this table shows how kite size relates to rider weight and wind speed. While your instructor makes the final call, this helps you understand the logic behind their choice.
| Wind Speed (knots) | Rider Weight 50-60kg | Rider Weight 60-75kg | Rider Weight 75-90kg | Experience Level |
|---|---|---|---|---|
| 15-20 knots | 9-10m | 10-12m | 12-14m | Beginner training kite |
| 20-25 knots | 7-9m | 9-10m | 10-12m | Beginner to intermediate |
| 25-30 knots | 5-7m | 7-9m | 9-10m | Advanced only for beginners |
| 30+ knots | 3-5m | 5-7m | 7-9m | Experts only |
Seeing this data, you can appreciate that a 75kg rider might use a 12m kite on a light-wind day but needs to downsize to a 9m kite when the famous El Médano trades kick in. This knowledge is not just academic; it’s fundamental to your safety and progression.
The Risk of Collisions in Crowded Bays and How to Avoid Them
El Médano’s world-class conditions attract riders from all over the globe, which means that on a perfect day, the bay can get very busy. For a beginner focused on just trying to stand up on the board, a crowded environment can feel chaotic and overwhelming. This is where the concept of “Defensive Kiting” becomes your most valuable skill. It’s a proactive mindset where you assume responsibility for your own safety bubble and learn to anticipate the actions of others.
Your instructor will keep you in a designated student zone, but it’s crucial to build good habits from day one. The most fundamental rule is maintaining a safe distance from other riders. Kitesurfing safety guidelines recommend keeping a minimum 50 meters downwind safety zone, which is roughly twice the length of your kite lines. This buffer gives you time to react if you or another rider loses control. Remember, as a beginner, you are the least predictable person on the water, so giving everyone else extra space is both courteous and essential for safety.
To navigate a busy bay safely, you must internalize a few core principles. These are not just suggestions; they are the unwritten laws of a shared space that keep everyone, from first-timer to professional, safe.
- Stay Predictable: Avoid sudden turns or changes in direction. Ride in a straight, predictable line so other, more advanced riders can easily navigate around you.
- Look Before You Turn: Always look over your shoulder and upwind before initiating any turn or transition to ensure your path is clear.
- Keep Your Kite High: When you’re not actively riding or are standing in the water, keep your kite at the 12 o’clock position (directly overhead). This minimizes your “footprint” in the sky and reduces the chance of your kite tangling with another.
- When in Doubt, Abort: If you feel you are losing control or are on a collision course, do not hesitate. The safest action is to immediately activate your kite’s primary safety release. It is far better to have a short swim to recover your gear than to be involved in an accident.
When to Book Lessons for Consistent But Manageable Wind?
While El Médano offers wind almost year-round, not all months are created equal for a beginner. The peak summer months of July and August bring the strongest, most reliable winds, but they also bring the biggest crowds and the most powerful conditions. For a beginner, this combination can be intense. The “best” time to learn is often during the shoulder seasons, when you get the perfect balance of consistent wind, manageable crowds, and pleasant temperatures.
Winds are steady yet moderate, making it an excellent period for both novices and experienced water sport lovers.
– TUI Weather Analysis Team, Best Time to Visit El Medano Guide
This insight is backed by data. By analyzing wind consistency, crowd density, and water temperature, we can identify the optimal windows for a first-time kiter. The months of May, June, and September offer an ideal learning environment. You’ll still experience the famous trade winds, but they are often slightly less ferocious than in mid-summer, and the water is significantly less crowded, giving you more space and mental bandwidth to focus on your progression. As one of the most important strategic choices you’ll make, timing your trip correctly can dramatically improve your learning curve and overall experience.
This table provides a monthly breakdown to help you plan your trip. A higher “Beginner Score” indicates a better combination of manageable wind and lower crowd levels, based on an analysis of seasonal conditions.
| Month | Wind Consistency (1-5) | Crowd Density (1-5) | Water Temp | Beginner Score (1-5) | Notes |
|---|---|---|---|---|---|
| March-April | 4 | 2 | 19-20°C | 5 | Ideal shoulder season, fewer crowds |
| May-June | 5 | 3 | 20-21°C | 5 | Peak beginner conditions, manageable crowds |
| July-August | 5 | 5 | 23-25°C | 3 | Strongest winds but very crowded |
| September-October | 5 | 3 | 23-24°C | 5 | Excellent shoulder season alternative |
| November-February | 4 | 4 | 18-20°C | 3 | Winter session, experienced kiters peak season |
Where to Go When El Médano Is Too Crowded for Your Skill Level?
Even with the best planning, you might encounter a day where the main bay at El Médano feels like rush hour traffic. On days like this, a smart beginner—and their instructor—knows that forcing a session is counterproductive. The professional mindset involves having a Plan B. Fortunately, the area offers excellent alternatives, both on and off the water.
The primary alternative spot is La Tejita, the vast golden sand beach on the other side of Montaña Roja. Many schools use La Tejita as a secondary location, especially during the peak season of July and August. It offers significantly more space, allowing you to practice maneuvers without the constant pressure of avoiding other riders. However, it’s important to note that the wind at La Tejita can be gustier and sometimes blow offshore, making it a spot to be used exclusively under the supervision of a school with a safety boat. It is not a place for a beginner to venture out alone.
Another powerful strategy is to embrace the concept of an “Active Rest Day.” If conditions in the bay are too challenging (either too crowded or too windy), don’t see it as a lost day. Instead, use the time to build complementary skills that will accelerate your kitesurfing progression.
- Improve Board Feel: Take a surf or SUP (Stand-Up Paddleboard) lesson. Both activities dramatically improve your balance, core strength, and ability to read the water.
- Study the Pros: Sit on the beach and watch the advanced kiters. Observe how they manage their kites, navigate traffic, and handle the chop. This is an invaluable, real-world lesson in technique and bay awareness.
- Master Your Gear: Use the downtime to review kite theory with your instructor. Practice setting up and packing down your equipment until it becomes second nature. Learn the basics of how your safety systems work.
This approach transforms a “no-go” day into a productive training session, reinforcing the idea that learning to kitesurf is a holistic process that happens both on and off the water.
Why Your Lake Experience Doesn’t Translate Directly to Ocean Sailing?
If you’ve tried wakeboarding or windsurfing on a placid lake, you might feel you have a head start. While board skills are always helpful, it’s crucial to approach the ocean with a beginner’s mindset. The dynamic, three-dimensional environment of the sea presents a set of challenges that flat water simply doesn’t prepare you for. The most significant of these is the “chop.”
Chop refers to the constant, small, and disorganized waves that cover the surface of the bay. They might not look like much from the shore, but when you’re on the board, they are a constant source of instability. Your board is continually being bumped and knocked off its line, requiring thousands of micro-adjustments in your ankles, knees, and core just to stay balanced. This is physically fatiguing and makes tasks that are simple on flat water, like the water start, significantly more complex.
Beyond the chop, you must develop a new level of environmental awareness. The ocean is not a static pool; it’s a living system with its own rhythms. Here are the key transitions you’ll need to master:
- Current Awareness: Even a slight current can push you downwind faster than you realize. Your instructor will teach you to spot it and to always aim further upwind than your instincts suggest.
- Shorebreak Management: The first ten meters from the beach and the last ten meters on your return are often the trickiest. You must learn to manage your board and kite simultaneously while navigating small breaking waves.
- Tide Monitoring: Tides can dramatically change the conditions. Low tide might reveal a flatter, calmer sea, while high tide can bring the waves and chop right up to the beach.
The key is to leave your ego on the shore. Acknowledge that you are learning a new discipline in a new environment, and focus on mastering these fundamental ocean skills before you try to replicate your flat-water performance.
Key takeaways
- El Médano is a viable but demanding spot for beginners, requiring a strategic approach.
- Choosing an IKO-certified school is the most critical safety and progression factor.
- Success involves understanding and adapting to the environment: strong winds, ocean chop, and crowds.
Navigating El Médano Bay: The Right-of-Way Rules Every Kiter and Windsurfer Must Know
The final piece of the puzzle is learning to share the water safely. Kitesurfing is not a solo activity; it’s a community sharing a playground. To be a part of it, you must learn the “rules of the road.” While there are formal right-of-way principles, a beginner in a busy spot like El Médano should operate from a simpler, safer framework: a Hierarchy of Responsibility.
Your number one priority, above all else, is to avoid collisions. This means that even if you technically have the right of way, you must always act to prevent an accident. As the rider with the least amount of control and experience, the responsibility falls on you to be predictable and give everyone else a wide berth. Your instructor will guide you, but you must actively participate in your own safety and the safety of those around you. The golden rule is simple: if you are ever in doubt, give way.
As you progress, you’ll learn the specific rules, like the “starboard tack” rule (the kiter with their right hand forward has priority). But to start, this simplified hierarchy will keep you safe:
- Level 1 Priority: Your instructor is your guide. Follow their path, stay in the designated student zone, and listen to their commands via the radio helmet.
- Level 2 Priority: Avoid everyone else. Maintain your safety bubble and assume other riders may not see you.
- Level 3 Priority: Yield to everyone else. Windsurfers are faster and less maneuverable. Swimmers and traditional surfers have no “engine” and cannot get out of the way. As the person with a kite, you have the most potential to cause harm, so you must be the most cautious.
This defensive mindset is perfectly summarized by Vincent, the IKO Head Training Master, who provides the ultimate principle for every kiter to remember.
Sailing rules state that the one with most maneuverability has to give right of way, in most cases this is us.
– Vincent, IKO Head Training Master, IKO Safety Standards Interview
Learning in El Médano will undoubtedly make you a better kiter. It forces you to master skills in challenging conditions from day one. By embracing a strategic and responsible mindset, you’re not just learning to kitesurf; you’re learning to become a competent and respected member of the global kitesurfing community.
With the right preparation, mindset, and instruction, you are now ready to take the next step. Your journey begins not on the water, but with the crucial decision of choosing the professional team that will guide you safely into this incredible sport.