In summary:
- Successful lava tube diving is not about bravery, but about rigorous adherence to specific protocols for propulsion, navigation, and equipment.
- Mastering specialized finning techniques like the frog kick is non-negotiable to prevent catastrophic silt-outs in confined spaces.
- Light is life support. Your setup must include a primary light and two redundant, easily accessible backups, with burn time exceeding the planned dive by at least 50%.
- A “swim-through” is not an assumption, it is a determination made through a strict pre-entry assessment of light, water flow, and sediment.
- Entry into any overhead environment requires specific training. An Open Water certification is the start, not the destination.
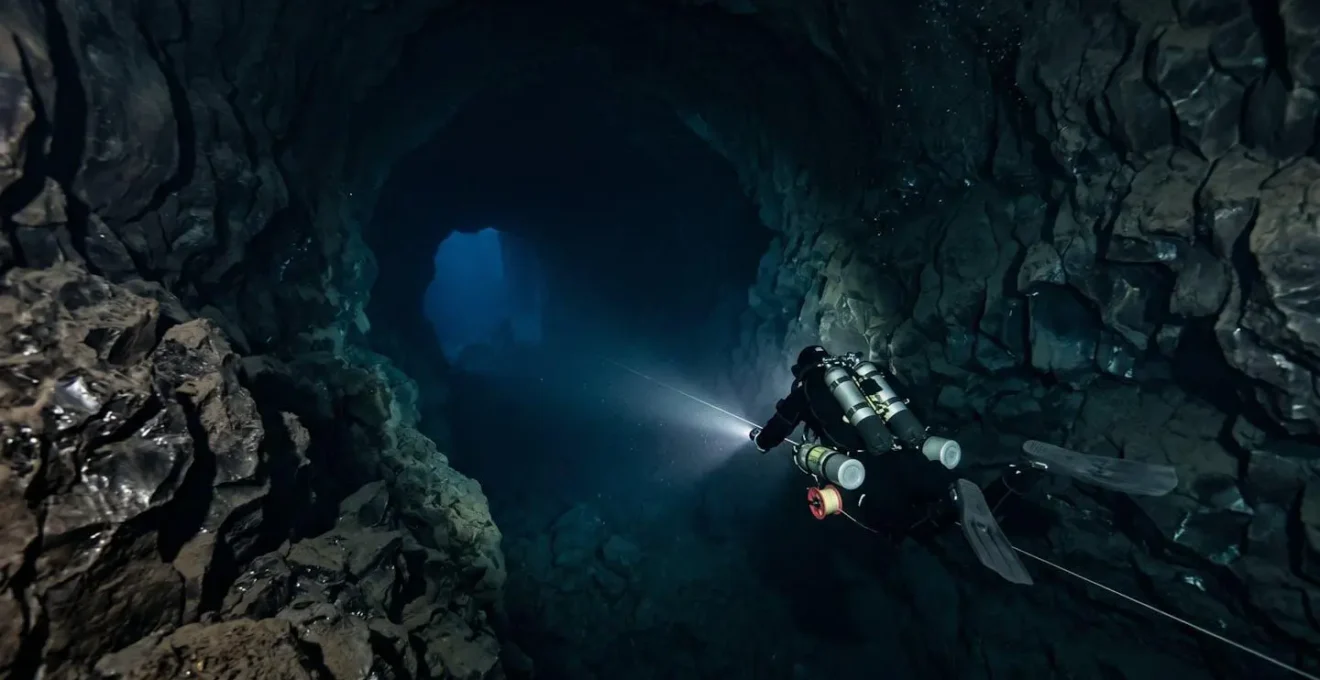
The allure of Tenerife’s volcanic underworld is undeniable. For the intermediate diver, those dark, silent archways promise an adventure far beyond the sunlit reefs. You’ve mastered your buoyancy, your gas consumption is predictable, and you feel ready for a new challenge. Yet, a primal caution holds you back. You’ve heard the generic warnings: “don’t enter enclosed spaces,” “it’s dangerous,” “you need a guide.” While true, this advice lacks the substance an analytical diver like you needs. It tells you the ‘what,’ but not the ‘why’ or the ‘how’.
The world of technical cave diving, often seen as an extreme pursuit, is built on a foundation of meticulous risk management, equipment redundancy, and precise motor skills. These are not arcane secrets, but logical solutions to the specific problems posed by an overhead environment. What if the key to safely exploring these magnificent lava tubes wasn’t just avoiding them, but adopting the core safety principles of those who navigate them for a living? This isn’t about becoming a full cave diver overnight. It’s about elevating your recreational diving practice with a technical mindset.
This guide will deconstruct the primary hazards of the volcanic overhead environment—from the unique geology and the ever-present risk of silt-out to equipment configuration—and provide you with the specific protocols and techniques used by trained cavern divers. We will transform abstract fear into a series of identifiable, manageable risks, equipping you with the knowledge to make informed decisions and, eventually, to explore with confidence and respect.
This article breaks down the essential safety protocols for navigating Tenerife’s unique underwater lava tubes. The following summary outlines the key areas we will cover, from geological understanding to emergency procedures, providing a structured approach to mastering this challenging and rewarding environment.
Summary: A Technical Approach to Recreational Lava Tube Diving
- Why Do Basalt Columns Form Perfect Hexagonal Shapes Underwater?
- How to Frog Kick Through Narrow Lava Tunnels Without Silt-Outs?
- Swim-Throughs vs Dead-Ends: How to Spot the Difference Before Entering?
- The Silt-Out Mistake That Disorients Divers in Volcanic Caves
- What Backup Torch Setup Is Essential for Safe Cavern Exploration?
- How to Equalize Effectively for a Quick Descent to 30 Metres?
- The Risk of Snagging Hoses on Exposed Metal Ribs
- Is The Cathedral Reef Suitable for Open Water Divers With Less Than 20 Logs?
Why Do Basalt Columns Form Perfect Hexagonal Shapes Underwater?
Understanding the environment is the first step in risk mitigation. The stunning, geometric formations you see in many of Tenerife’s lava tubes are not random. They are a direct result of physics. These structures are known as columnar basalt. As a thick lava flow cools, it contracts, creating tension. If the conditions are just right—a homogenous lava composition and a slow, uniform cooling rate—the rock will fracture in the most mechanically efficient way possible. That shape is the hexagon. This process, known as columnar jointing, creates a network of vertical fractures that propagate downwards as the lava cools from the top surface.
This geological process has direct implications for a diver. The surfaces, while beautiful, are often sharp and abrasive. The hexagonal columns can create tight restrictions and complex, maze-like structures. Unlike a smooth reef, these are angular, unforgiving surfaces that can easily snag equipment or damage a drysuit. Recognizing this inherent structure is not just an geological curiosity; it’s a crucial part of your pre-dive planning, informing your equipment configuration and your approach to navigating the environment. The very physics that creates the beauty also creates the specific hazards you must prepare for.
As Wikipedia contributors explain in their article on the topic, this is a common geological phenomenon. They state that “Columnar jointing occurs in many types of igneous rocks and forms as the rock cools and contracts”. This process is identical whether it happens on the surface, creating formations like the Giant’s Causeway, or underwater, sealed for millennia in a lava tube.
How to Frog Kick Through Narrow Lava Tunnels Without Silt-Outs?
In an overhead environment, your fins are not just for propulsion; they are precision instruments. The standard flutter kick taught in open water courses is a liability in a lava tube. It directs a powerful jet of water downwards, instantly disturbing the fine, glassy volcanic sediment on the floor. This creates a silt-out, a zero-visibility event that is one of the most dangerous situations a diver can face. The solution is not to stop kicking, but to change how you kick. The frog kick is the foundational propulsion technique for any overhead environment.
The key to a proper frog kick is keeping your fins parallel to the bottom and ceiling. You bend your knees, bringing your heels together, then extend your legs outwards and backwards in a smooth, wide arc, squeezing the water behind you. The propulsive force is directed purely backward, not down. This requires conscious control of your body position, maintaining perfect horizontal trim. For extremely tight passages, even a standard frog kick is too powerful. This is where you employ a modified frog kick, using only small movements from the ankles and lower legs. In situations requiring a 360-degree turn on the spot without moving forward, the helicopter turn—executing the frog kick motion with a single fin—is essential.
Mastering these propulsion techniques is a prerequisite. It is a motor skill that must be practiced until it is second nature, allowing you to move with deliberate, minimal-impact grace. Your goal is to be a ghost in the environment, leaving no trace of your passage. The list below outlines the core techniques every aspiring cavern diver must perfect.
- Standard Frog Kick: Bend knees at 90° angle upward with fins parallel to bottom, kick rearward in arc shape while keeping body horizontal to avoid downward propulsion that stirs silt.
- Modified Frog Kick (Short Frog Kick): Restrict thigh and knee movement, use only slight hip movement and ankle kicks for tight spaces with minimal thrust output.
- Helicopter Turn: Execute frog kick motion with single fin only to rotate 360° in your own body length without forward movement or silting.
- Pull-and-Glide: Use gloved hands on stable rock formations to pull body forward in zero-clearance sections while keeping fins completely still.
Swim-Throughs vs Dead-Ends: How to Spot the Difference Before Entering?
The mesmerizing blue light at the end of a dark tunnel is a siren’s call to a diver. But is it a true exit or merely a reflection in a dead-end chamber? Misjudging this is a primary cause of disorientation. A true swim-through is a conduit for water flow, while a dead-end is a stagnant pocket. This fundamental difference leaves clues that a trained eye can detect before committing to entry. Assuming an opening is a viable exit without a proper assessment is a critical and common error.
Your assessment should begin from the outside. First, analyze water flow indicators. A true swim-through will often have scoured rock surfaces near the entrance and an absence of fine silt, a sign that water movement keeps it clean. A dead-end, by contrast, will typically show an undisturbed, dusty accumulation of sediment. Second, evaluate the quality of the light. A sharp, clearly defined shape of blue or green light that changes as you move indicates a direct line of sight to open water. A faint, diffuse, or static glow is often just light reflecting off a back wall. It’s a false promise. If in doubt, apply the 5-meter reconnaissance rule: secure a temporary guideline at the entrance and penetrate no more than five meters to gain a better vantage point, always maintaining a direct path to your tie-off.
This pre-entry protocol transforms a hopeful guess into a calculated decision. It is a non-negotiable safety step. Never enter a passage assuming it leads somewhere. You must prove it to yourself first, using this systematic assessment.
- Analyze water flow indicators: True swim-throughs show scoured rock surfaces and absence of fine silt at entrance due to water movement; dead-ends have dusty, undisturbed sediment accumulation.
- Evaluate light quality: Sharp, defined blue or green light shape indicates genuine exit; faint, diffuse, static glow often indicates reflection from a chamber or false exit.
- Apply the 5-meter reconnaissance rule: Tie off guideline, penetrate maximum 5 meters, assess from that vantage for visible unobstructed exit, water movement, and passage width consistency.
- Check for flow direction: Use fine silt or small particles released near entrance to detect subtle current that confirms through-passage versus stagnant dead-end environment.
The Silt-Out Mistake That Disorients Divers in Volcanic Caves
A silt-out is the sudden and total loss of visibility caused by disturbing fine sediment. In the volcanic caves of Tenerife, the silt is composed of fine, glassy tephra that, once suspended, can hang in the water column for many minutes, creating a disorienting, impenetrable cloud. The single biggest mistake divers make is trying to “swim out” of the problem. Panicked finning or frantic arm movements only worsen the situation, expanding the cloud and disorienting both you and your buddy. This mistake can turn a minor issue into a life-threatening emergency.
The correct response is counter-intuitive: you must stop all movement immediately. Freeze. This prevents you from making the visibility worse and allows you to maintain your position relative to your guideline or a known reference. Any attempt to find your way by sight is futile and dangerous. This is now a tactile, not a visual, problem. Your training must take over. The protocol is strict and must be followed without deviation. Even trained divers can fall victim to complacency, which is why diligent practice of emergency procedures is essential. In fact, according to comprehensive cave diving safety research, the proportion of trained divers among fatalities has grown, highlighting that certification alone is not a guarantee of safety if protocols are ignored.
Once you have stopped, you and your buddy must execute a zero-visibility protocol. This involves establishing physical contact with each other or the guideline, communicating through touch signals, and waiting patiently for the silt to settle. It requires immense discipline and trust in your training and equipment. Attempting to navigate visually is a recipe for disaster.
Your Action Plan: Zero-Visibility Emergency Protocol for Silt-Out
- STOP: Immediately cease all movement including fin kicks, arm movements, and buoyancy adjustments to prevent worsening visibility.
- DEPLOY: Activate backup light and press it directly against dive mask to create focused illumination for reading gauges in zero visibility.
- ESTABLISH: Make physical contact with guideline or wall using systematic hand sweeps, maintaining exact body position throughout search.
- COMMUNICATE: Use pre-arranged touch signals on guideline or buddy’s body to coordinate team movement without visual reference.
- WAIT: Remain stationary for predetermined time (typically 3-5 minutes minimum) to allow suspended volcanic silt to settle before attempting exit.
What Backup Torch Setup Is Essential for Safe Cavern Exploration?
In an overhead environment, light is not for looking at fish; it is a critical piece of life-support equipment. If your single torch fails and you have no backup, you are effectively blind and lost. The concept of redundancy is paramount. It is not enough to simply bring “a” backup light. A safe cavern diver must have a system: one primary light and a minimum of two functionally independent, fully-charged backup lights. Each light must have sufficient burn time to allow a safe exit from the furthest point of penetration.
The golden rule for lighting is a direct parallel to the rule of thirds for gas management. In fact, according to the golden rules of cave diving safety, the primary light’s burn time must be at least 1.5 times the planned dive duration, with two backups each capable of getting you out. Your backups must be as reliable as your primary. They should be stowed in a way that is both snag-proof and easily accessible with one hand in a zero-visibility, high-stress situation. This means no loose lanyards dangling from your wrist. The best mounting methods keep the lights tight to your body, on harness D-rings or in thigh pockets, until the moment they are needed.
The way you carry your lights is as important as the lights themselves. A streamlined configuration is a safe configuration. The table below compares common mounting systems, allowing you to make an informed choice based on deployment speed and snag risk in the tight, abrasive lava tube environment.
| Mounting Method | Deployment Speed | Snag Risk in Tight Tubes | One-Handed Access | Best Use Case |
|---|---|---|---|---|
| Bungeed to Harness D-ring | Fast (2-3 seconds) | Low (close to body) | Yes | Primary backup position for all cave diving |
| Thigh Pocket | Moderate (5-8 seconds) | Very Low (completely enclosed) | Yes (with practice) | Secondary backup for exploration dives |
| Wrist Lanyard | Immediate (1 second) | Moderate (can catch on protrusions) | Limited | Emergency situations requiring instant light |
| Helmet Mount | N/A (always on) | Low | N/A (hands-free) | DPV diving or when using guideline reel |
How to Equalize Effectively for a Quick Descent to 30 Metres?
Many of Tenerife’s most spectacular lava tubes, or ‘jameos’, begin with a near-vertical descent. A rapid, controlled descent to 30 metres is often necessary to maximize bottom time and manage gas. However, this presents a significant challenge for ear equalization. A slow, struggling descent is not only inefficient but also dangerous, increasing gas consumption and stress. The standard Valsalva maneuver (pinching your nose and blowing) is often ineffective and can even cause injury under these conditions.
The key to a successful rapid descent is proactive, efficient equalization. As explained by InDEPTH Magazine, the risks at depth are compounded: “Increased depths further reduce a diver’s available time, and factors such as narcosis, gas density, and oxygen toxicity can combine to increase the risk of deeper dives”. Therefore, mastering advanced equalization is critical. First, you must maintain a feet-first orientation. Descending head-first makes it physically more difficult for your Eustachian tubes to open. Second, you must learn the Frenzel technique. Instead of using your diaphragm to blow, you use your tongue as a piston to push air against the back of your throat while keeping your glottis closed. This is a more controlled, less forceful, and ultimately more effective method that can be performed hands-free. Finally, you must equalize rhythmically and proactively—every meter or two, *before* you feel any pressure or discomfort.
This systematic approach turns a potentially painful and dangerous descent into a smooth, controlled transition to your target depth. It is a skill that must be practiced in open water until it is second nature.
- Pre-Equalization: Gently equalize on the surface before descent begins to pre-pressurize middle ear spaces and establish baseline comfort before entering a vertical jameo entrance.
- Feet-First Descent Positioning: Maintain vertical feet-down orientation along a reference line to keep your head elevated for easier Eustachian tube opening.
- Frenzel Technique: Use your tongue as a piston to compress air in your mouth and nasopharynx, allowing for hands-free operation for torch and reel management.
- Rhythmic Equalization Protocol: Equalize proactively every 1-2 meters before feeling pressure, creating an automatic rhythm to prevent failure in the dark, distracting lava tube environment.
The Risk of Snagging Hoses on Exposed Metal Ribs
While the title mentions metal ribs, a hazard of wreck diving, the principle is even more critical in lava tubes. The walls are not smooth; they are covered in razor-sharp obsidian and abrasive basalt projections. An improperly routed regulator hose or a dangling SPG can easily become an entanglement hazard. A snag can cause equipment damage, a catastrophic gas loss, or, at worst, trap you in a confined space. The solution lies in a philosophy of a ‘clean’ or ‘streamlined’ equipment configuration.
Every hose, buckle, and accessory on your person must be secured and routed close to your body. There should be nothing dangling. Hoses should be routed under your arms, secured with retainers. Your SPG should be clipped to a harness D-ring, not floating freely. This isn’t just about looking professional; it’s about minimizing your profile and making yourself as snag-proof as possible. However, even with the most streamlined setup, snags can happen. The moment you feel resistance, your response must be immediate and automatic. The single worst thing you can do is push forward to try and “power through” it.
The correct procedure is a self-rescue protocol that must be drilled until it is instinct. It is a simple, four-step process that can be executed by touch in zero visibility.
- STOP forward motion: Immediately cease all forward movement the instant resistance is felt to prevent equipment damage or BCD/drysuit puncture from sharp obsidian projections.
- SIGNAL hold: Communicate a clear ‘Stop’ signal to your buddy using your light or a hand signal to prevent their continued movement from creating tension or team separation.
- IDENTIFY snag point: Systematically feel backward along your body and equipment surfaces to locate the exact snag point without visual confirmation.
- REVERSE movement: Gently reverse your last movement, using careful backward propulsion or a pull-and-glide to unhook from the invisible lava horn or basalt shard.
Key takeaways
- Mastery over your equipment and environment is not a suggestion, but a prerequisite for entering any overhead space.
- The most dangerous element in a cave is often the diver who overestimates their ability and underestimates the environment’s specific hazards.
- Progression in diving is a staircase, not an elevator. Each new environment demands new training, new skills, and a renewed sense of humility.
Is The Cathedral Reef Suitable for Open Water Divers With Less Than 20 Logs?
This question is a proxy for a much broader one: “When am I ready for an overhead environment?” The answer is unequivocally not after 20 open water dives. The Cathedral, with its magnificent basalt columns and dramatic lighting, is a cavern dive. While it has a permanent guideline and is considered an entry-level overhead dive, “entry-level” in this context does not mean “for beginners.” The environment presents all the risks we’ve discussed: potential for silt-outs, entanglement hazards, and the absolute requirement for advanced propulsion and buoyancy skills. An Open Water certification simply does not prepare a diver for these specific challenges.
Readiness is not measured in the number of logged dives, but in the mastery of specific skills. It’s about having perfect, unconscious buoyancy control, being able to hold a stationary position in the water column without moving a muscle, and having multiple propulsion techniques at your disposal. It requires a mindset shift from being a passive observer of the underwater world to an active manager of risk. This is a domain where complacency is lethal. Indeed, according to long-term cave diving accident analysis, since the year 2000, approximately 80% of accidents have involved divers who were already certified for cave diving, demonstrating that training is the beginning of a continuous process of diligence, not a final shield against danger.
So, how do you get ready? You build a roadmap. You don’t jump from the shore to the summit; you climb the mountain one step at a time, building experience and skills methodically. The following roadmap is your path from an ambitious Open Water diver to a diver who is truly prepared to safely and respectfully enter The Cathedral.
Your Action Plan: Readiness Roadmap for Aspiring Cathedral Reef Divers
- Step 1 – Master Buoyancy Control: Complete a Peak Performance Buoyancy specialty or equivalent to achieve the precise neutral buoyancy and trim essential for overhead environments.
- Step 2 – Gain Deep Diving Experience: Obtain an Advanced Open Water certification with an emphasis on 30-meter dives to build comfort with depth, gas consumption, and equalization under pressure.
- Step 3 – Complete Cavern or Intro-to-Cave Specialty: Take formal overhead environment training covering guideline use, emergency protocols, specialized propulsion techniques, and psychological preparation.
- Step 4 – Build Local Experience: Dive less-demanding Tenerife sites like Radazul or Abades with an experienced guide to practice skills in a volcanic substrate before attempting an advanced lava tube penetration.
Your journey into the world of overhead environments begins not with a dive into a cave, but with a commitment to advanced training and a deep respect for the environment. Begin by seeking out a qualified technical or cavern diving instructor to start building these essential skills.