Capturing the true scale of a submarine amphitheater isn’t about having the widest lens, but mastering the art of sculpting space with light and perspective.
- Choose your lens based on the story: immersive fisheye for visceral experiences, or rectilinear wide-angle for majestic, architectural lines.
- Use strobes not just to illuminate, but to “paint” foreground subjects and create volumetric shadows that define the immense background.
- A diver in the frame is a tool for emotional scale, not just a measurement; their position and pose must convey a sense of awe.
Recommendation: Prioritize mastering buoyancy and situational awareness; the best shot is worthless if it compromises safety.
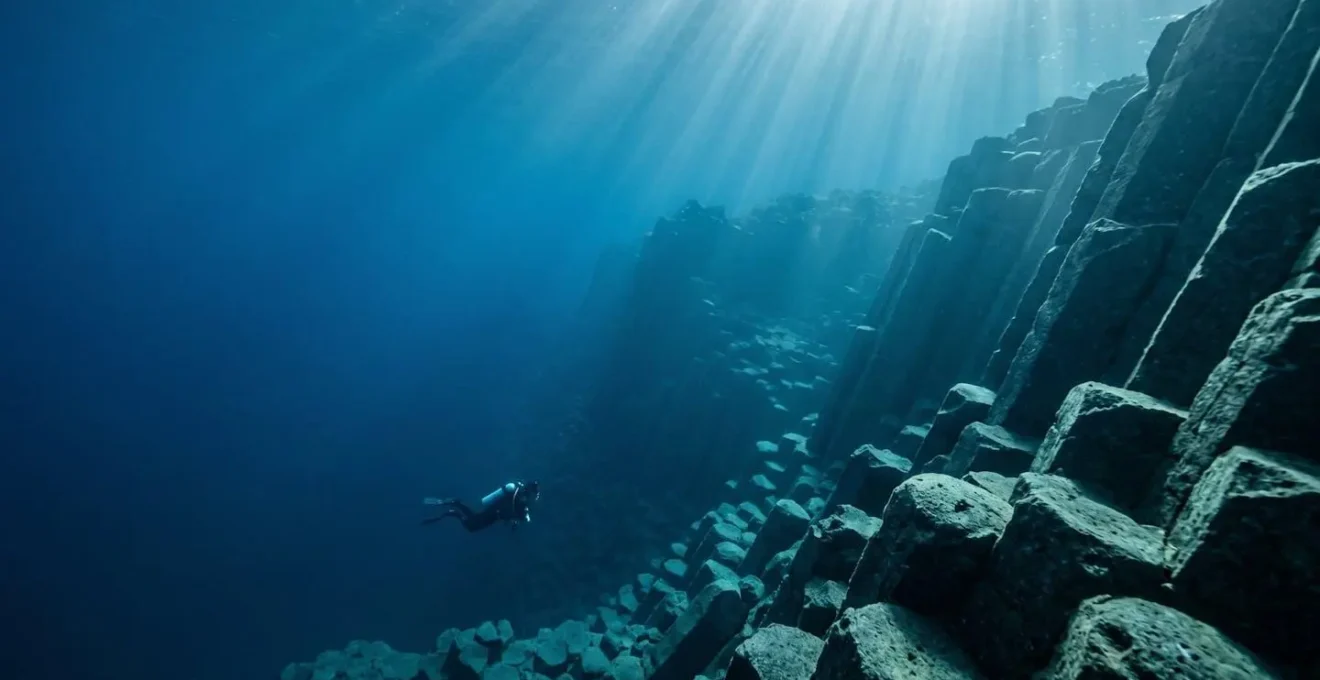
Every underwater photographer has felt the frustration. You hover before a colossal rock wall, a vast submarine amphitheater stretching into the blue gloom, feeling a profound sense of awe. You raise your compact camera, frame the shot, and click. Back on the boat, the image on your screen is a flat, uninspired blue rectangle. The immensity is gone, the grandeur lost. The common advice is to simply get a wide-angle lens and place a diver in the frame, but this often just produces a photo of a small diver in a big, boring space.
This approach fails because it treats the scene as a subject to be documented, not an experience to be crafted. But what if the real key was not in documenting the space, but in sculpting it? The secret to capturing grandeur lies in thinking like an architect of light and space. It requires you to move beyond simple exposure and composition rules and instead focus on how light carves out volume, how shadows create depth, and how a human element can tell a story of exploration rather than just provide a unit of measurement.
This guide is built on that architectural philosophy. We will deconstruct the process of capturing vastness, focusing on the deliberate, artistic choices that transform a simple snapshot into a breathtaking image. We’ll explore the technical decisions about light and lenses through the lens of artistic intent, turning you from a passive documentarian into an active creator of awe-inspiring underwater landscapes.
To help you master this architectural approach, this guide breaks down the essential techniques for lens selection, lighting, composition, and safety. The following sections will provide a clear path to elevating your underwater landscape photography.
Summary: Capturing the Scale of the Submarine Amphitheater: Lens Choices for Compact Cameras
- Why Harsh Shadows Ruin Photos in Deep Amphitheater Structures?
- How to Position Divers to Show Scale in Massive Rock Formations?
- Fisheye vs Wide Angle: Which Wet Lens Fits Your Compact Housing?
- The Risk of Losing Your Buddy in the Gloom While Focusing on Settings
- When to Dive the Amphitheater for Natural Sunlight Penetration?
- Wide Angle vs Macro: Which Lens to Choose for Tenerife’s Dramatics?
- How to Set Your Camera for Wide Angle Shots in Low Contrast Blue Water?
- How to Photograph Tenerife’s Volcanic Seascapes Without Backscatter Ruining Your Shot?
Why Harsh Shadows Ruin Photos in Deep Amphitheater Structures?
In the vast, dark expanse of a submarine amphitheater, light is your primary sculpting tool. However, misused light can destroy the very sense of scale you’re trying to create. The most common mistake is creating harsh, flat shadows with on-camera or poorly positioned strobes. As DivePhotoGuide points out, the physics are simple: hard light produces stark, distracting shadows, while soft, diffused light creates the gentle gradients that reveal form and volume. An analysis confirms that hard light falls off quickly and casts harsh shadows, which in a massive structure, translates to a small, brightly lit patch surrounded by an impenetrable, featureless black void. This erases the subtle textures and receding planes of the rock formation, effectively flattening the image and destroying depth.
The goal is not to eliminate shadows, but to control them, turning them into a compositional element. Think of them as volumetric shadows—tangible forms that help carve out the shape of the underwater architecture. Instead of a destructive byproduct, a soft, controlled shadow can create a leading line, frame a subject, or add a sense of mystery to the unseen depths. By learning to sculpt with light, you replace harsh, detail-hiding voids with soft, form-defining gradients. The amphitheater ceases to be a flat backdrop and becomes a three-dimensional, explorable space in your photograph.
How to Position Divers to Show Scale in Massive Rock Formations?
Placing a diver in the frame is the classic technique for showing scale, but its effectiveness depends entirely on execution. A poorly placed model becomes a distraction; a well-positioned one becomes a storyteller. The goal is to create emotional scale, not just a visual ruler. The diver’s purpose is to act as a proxy for the viewer, their pose and gaze conveying a sense of awe and wonder that the viewer can then share. They should be exploring the scene, not posing for the camera.
Compositionally, placing the diver in the foreground and off-center, adhering to the rule of thirds, creates a powerful sense of depth. This forces the viewer’s eye to travel from the relatable human form across the negative space to the massive structure in the background. The diver’s equipment, particularly their dive light, can be used as a potent compositional tool. A beam of light cutting through the gloom acts as a leading line, guiding the viewer’s attention and suggesting a journey into the unknown. A case study from the Divers Alert Network highlights this, showing how directed models who add a logical narrative element, such as a diver lighting up a dark recess, transform a simple seascape into a compelling story of exploration.
The key is intentionality. The diver’s gaze should be directed towards the feature of interest, their body language open and inquisitive. This subtle direction transforms them from a mere object of scale into the protagonist of your underwater epic, inviting the audience to feel the vastness rather than just see it.
Fisheye vs Wide Angle: Which Wet Lens Fits Your Compact Housing?
The lens you choose is not just a technical decision; it’s the foundational choice that defines the entire perspective of your story. For capturing vast submarine amphitheatres with a compact camera, the debate centers on two primary wet lens options: the fisheye and the rectilinear wide-angle. This isn’t a matter of “better” or “worse,” but a choice between two distinct artistic visions: immersive experience versus majestic architecture. The fisheye, with its signature barrel distortion, bends straight lines and pulls the viewer into the very center of the scene. It excels at creating a visceral, personal feeling of being enveloped by the environment. As the experts at Bluewater Photo suggest, for many underwater scenes, the fisheye should be considered the default choice, not a specialty lens.
Conversely, the rectilinear wide-angle lens strives to keep lines straight, preserving the structural integrity of the scene. This makes it the choice for creating clean, architectural compositions that emphasize the grand, formal structure of a rock wall or canyon. It presents the scene with a sense of detached, majestic grandeur. For the compact camera photographer, this choice is crucial and impacts everything from composition to focus. The following comparison, based on data from the Underwater Photography Guide, breaks down the key characteristics to help you decide which story you want to tell.
This table summarizes key differences to inform your choice, with data compiled from an in-depth analysis of lens characteristics for underwater use.
| Characteristic | Fisheye Lens | Rectilinear Wide-Angle |
|---|---|---|
| Artistic Effect | Immersive and visceral – puts viewer inside the scene | Architectural and majestic – preserves straight lines for grandeur |
| Field of View | Up to 180° diagonal degrees ultra-wide | 24-35mm focal length range |
| Distortion | Intentional barrel distortion with curved edges – desired feature underwater | Minimal distortion – maintains straight lines |
| Optical Performance | Performs better optically behind dome ports | Adequate but less optimal behind dome ports |
| Creative Challenge | Demands extremely close approach to foreground elements | Corner softness on compacts creates natural vignette effect |
| Best For | Fine art prints with immersive feel, giant subjects (mantas, whale sharks) | Minimalist architectural compositions emphasizing structure |
| Focus Speed | Faster autofocus underwater | Slower autofocus |
The Risk of Losing Your Buddy in the Gloom While Focusing on Settings
While we pursue the perfect image, we must never forget we are divers first and photographers second. The deep, often dark, environment of a submarine amphitheater presents significant safety challenges, which are compounded by the intense focus required for photography. This “task fixation” is a well-known risk; when your head is down, absorbed in adjusting settings or framing a shot, it’s dangerously easy to lose track of your buddy, your depth, and your air supply. This is why most dive professionals recommend that a photographer have significant dive experience before even taking a camera underwater. A frequently cited guideline suggests a minimum of 40-50 logged dives to build the necessary buoyancy and awareness before adding the complexity of photography.
The antidote to task fixation is a disciplined, non-negotiable workflow. Your safety and that of your buddy depend on turning situational awareness into a muscle-memory cycle that interrupts your creative focus at regular intervals. This isn’t about compromising your photography; it’s about creating a sustainable and safe framework within which you can be creative. Before even entering the water, a thorough pre-dive brief with your buddy is essential to establish clear communication and emergency procedures. The professional’s approach is to automate safety checks so that creativity can flourish without compromising safety.
Your Action Plan: Photographer’s Situational Awareness Cycle
- Pre-Dive: Establish clear, photo-specific hand signals with your buddy (e.g., ‘hold pose,’ ‘stop shooting,’ ‘aim light here’).
- Pre-Dive: Practice adjusting all camera settings on land until it becomes second nature, minimizing head-down time underwater.
- Pre-Dive: Verbally agree on emergency procedures, including what to do if one of you has a camera malfunction that requires attention.
- In-Water Cycle: Follow a strict “Shoot, Check Air, Check Buddy, Check Depth” sequence. After a series of shots, consciously pause your photography to perform these three vital checks.
- In-Water Cycle: Only after confirming your own status, your buddy’s location and status, and your position in the water column should you return to shooting.
When to Dive the Amphitheater for Natural Sunlight Penetration?
While strobes are essential for sculpting foregrounds, the most powerful light source is the sun itself. Harnessing natural light is the key to revealing the true scale and mood of a deep amphitheater. However, not all sunlight is created equal. The harsh, vertical light of midday tends to flatten the underwater landscape. The true magic happens during the “golden hours” of early morning and late afternoon. During these times, the sun is at a lower angle to the horizon. As Nature TTL notes, “Sunrise and sunset dives will leave you in ‘golden hour’ – a photographer’s best friend. Having the sun at a lower angle means that light rays will be warmer and softer as they penetrate the surface.”
This angled light is what creates the spectacular, cathedral-like “god rays”—visible beams of sunlight that slice through the water column. These rays are the ultimate tool for an architect of light. They are powerful leading lines, drawing the eye from the bright surface into the deep. They create a dynamic interplay of light and shadow, illuminating particles in the water (the Tyndall effect) and painting the underwater rock faces with shifting patterns. Planning your dive to coincide with these moments transforms the water from a simple blue background into a living, breathing part of your composition. It requires coordination with your dive operator and an understanding of the dive site’s orientation relative to the sun, but the payoff is an image filled with drama, depth, and a painterly quality that strobes alone can never replicate.
Working with natural light elevates a photograph from a technical record to an atmospheric portrait of the underwater world. It’s about being in the right place at the right time to capture the sun painting its masterpiece.
Wide Angle vs Macro: Which Lens to Choose for Tenerife’s Dramatics?
While this guide focuses on vast amphitheatres, the core principle of strategic choice applies everywhere, especially in a location as diverse as Tenerife. The island’s volcanic origins offer both sweeping basalt column landscapes and sheltered bays teeming with tiny, unique critters. Arriving at a dive site with the wrong lens setup is a recipe for frustration. You cannot shoot a towering volcanic wall with a macro lens, nor can you capture the intricate detail of a nudibranch with a wide-angle. Therefore, the most critical skill is not just using the lens, but gathering the intelligence to choose the right one before you even get wet.
This is where pre-dive planning becomes paramount. Your dive is not a random encounter; it’s a planned mission. A simple phone call to the dive center the day before can provide the crucial intel you need. Asking about the primary profile of the planned dive site—is it a landscape dive or a creature hunt?—allows you to commit to a lens with confidence. For a compact camera user, this might mean deciding whether to mount your wide-angle wet lens or a macro diopter. Advanced users might even employ flip adapters that allow for switching between macro and wide on a single dive, offering the ultimate flexibility. The key is to shift your mindset from reacting to the dive site to proactively preparing for it. This strategic approach ensures you always have the right tool for the artistic job at hand.
Your Action Plan: Intelligence Gathering for Optimal Lens Selection
- Contact the dive center 24 hours prior and ask for the specific site’s profile: “Are we expecting big scenery or small creatures?”
- For Tenerife’s iconic basalt columns and swim-throughs, commit to the wide-angle lens as your non-negotiable primary choice.
- If the briefing indicates a sheltered bay known for nudibranchs or seahorses, the macro lens or diopter is essential.
- Investigate ‘flip’ adapters for your compact housing, which allow you to mount a macro diopter over your camera’s native lens and flip it out of the way for wide scenes.
- If doing a two-tank trip, plan strategically: dedicate the first dive to landscapes with the wide-angle, and the second to a known macro site.
How to Set Your Camera for Wide Angle Shots in Low Contrast Blue Water?
The water itself is the biggest challenge in wide-angle underwater photography. As the Underwater Photography Guide succinctly states, “Water reduces color, contrast, and sharpness.” In the deep blue of an amphitheater, this manifests as a low-contrast, monochromatic scene. Without a subject close to the lens, everything can mush into a single shade of blue. The architectural photographer’s job is to create or sculpt contrast where none naturally exists. This is achieved through a combination of in-camera lighting techniques and deliberate post-processing.
In the water, the primary technique is to use your strobes to “paint” a single foreground element with light and color. This creates a powerful color and luminosity contrast against the blue background. Don’t try to light the entire amphitheater—it’s impossible and will only create backscatter. Instead, light a small piece of coral, a lone sea fan, or your dive buddy, and let that well-lit subject pop against the vast, ambient-light background. Another powerful technique is to shoot from a low angle upwards. This frames your subject against a gradient of blue, from dark at your level to bright near the surface, providing a natural depth cue. Sometimes, the most powerful statement is embracing the minimalism and composing a strong silhouette against the clean blue water.
In post-processing, you can further enhance this sculpted contrast. Judicious use of the ‘Dehaze’ slider can restore micro-contrast lost in the water column, while an S-shaped tone curve can increase mid-tone contrast without losing detail in the highlights or shadows. By combining these in-camera and post-production techniques, you can carve out definition and depth from the seemingly uniform blue.
Key Takeaways
- Lens choice is an artistic decision between immersive (fisheye) and architectural (rectilinear) storytelling.
- Light is for sculpting volume and contrast, not just for exposure. Use strobes to paint foregrounds and let shadows define the background.
- Safety is paramount. Master buoyancy and the ‘Shoot, Check Air, Check Buddy, Check Depth’ cycle before focusing on complex shots.
How to Photograph Tenerife’s Volcanic Seascapes Without Backscatter Ruining Your Shot?
You’ve mastered light, chosen your lens, and composed a masterpiece. There is one final, insidious enemy that can ruin it all: backscatter. In volcanic environments like Tenerife, this problem is magnified. The fine, black volcanic sand is easily disturbed and highly reflective, creating a blizzard of bright white spots in your image. For compact camera users, the challenge is even greater, as strobes are often mounted closer to the lens axis, which perfectly illuminates the particles directly in front of your camera. Conquering backscatter is the final act of a true underwater architect, ensuring your grand design is presented on a clean, unblemished canvas.
The fight against backscatter is waged on three fronts: prevention, in-water correction, and post-production forgiveness. Prevention is by far the most important. It requires impeccable buoyancy control—mastering the frog kick and helicopter turn to avoid stirring the sediment. It also means approaching subjects from the up-current side, so any disturbed particles are swept away from your lens. Finally, it involves careful strobe positioning, angling them outwards to light the subject from the sides rather than head-on, preventing the cone of light from intersecting the water column directly in front of the lens.
Case Study: The Compact Camera Backscatter Challenge
Compact camera systems face an inherent disadvantage because their strobes are, by necessity, mounted closer to the optical axis of the lens. This proximity creates a perfect geometry for illuminating particles. A study of beginner setups shows that photographers who don’t actively move their strobes away from the camera housing on articulated arms suffer from significantly more backscatter. Successful photographers learn to pull their strobes back and angle them outwards, using test shots of the sandy bottom to visualize where the light is falling and ensure it doesn’t create a “hot spot” directly in their field of view.
If prevention fails and you find yourself in a cloud of particles, the best tool is patience. Wait 30 to 60 seconds for the sediment to settle. In post-production, tools like the clone stamp and healing brush can remove isolated spots, but this is a time-consuming process. Mastering the preventative techniques is the hallmark of a professional who respects their environment and their time.
Now that you have the architectural framework, it’s time to apply it. On your next dive, don’t just take a picture of the scene—sculpt it, shape it, and tell its story. Your compact camera is more than a recording device; it’s a tool for creating awe.