In summary:
- Effective planning for a one-week dive trip isn’t about finding a “best of” list; it’s about building a strategic sequence.
- Structure your week by progressing from shallower to deeper dives, and time your excursions to avoid the 10 AM crowds at popular sites.
- Maximize value by choosing boats, dive packages, and site types that align with your specific experience level, comfort, and budget.
You have one precious week to explore the volcanic underwater landscapes of southern Tenerife. The clock is ticking, and the internet bombards you with dozens of “must-see” dive sites. The typical approach? Pick five at random from a blog post and hope for the best. This often leads to logistical headaches, mismatched dive profiles, and the frustrating experience of sharing a beautiful wall with twenty other groups of divers. You might see some great things, but it won’t feel like the seamless, optimized adventure you dreamed of.
Most guides give you a list; they give you the “what.” They’ll tell you about the rays at Palm-Mar or the swim-throughs at Montaña Amarilla. What they don’t tell you is the “how” and the “why.” How do you sequence these dives for maximum safety and enjoyment? Why should you choose a RIB for one trip and a hard boat for another? How do you structure your days to see the most marine life while avoiding the peak-season rush? This is where strategic planning transforms a good dive holiday into an exceptional one.
This guide flips the script. Instead of just handing you a generic itinerary, it gives you the framework of a professional dive trip planner. We’ll move beyond the simple list of sites to focus on the core principles of dive sequencing, logistical efficiency, and value optimization. You will learn how to build a bespoke itinerary that is perfectly calibrated to your skill level, budget, and the limited time you have. By the end, you won’t just have a plan; you’ll have the knowledge to create the perfect dive week, every time.
This article provides the strategic pillars for organizing your trip. Below, you will find a detailed breakdown covering everything from the advantages of boat access to the nuances of budgeting for your stay.
Contents: Your Strategic Dive Planning Framework
- Why Boat Diving Accesses Superior Sites Compared to Shore Diving Here?
- How to Sequence Your Dives from Easy Reefs to Deep Drop-Offs?
- Deep Walls vs Shallow Gardens: Which Sites Suit Your Experience Level?
- The Risk of Visiting Top Sites at 10 AM During High Season
- How to Rotate Morning and Afternoon Dives to Maximize Site Variety?
- 6-Dive Pack vs Unlimited Diving: Which Offers Better Value for You?
- RIBs vs Hard Boats: Which Vessel Suits Your Comfort Level?
- Planning a Tenerife Dive Trip: How to Budget for a 1-Week Stay in High Season?
Why Boat Diving Accesses Superior Sites Compared to Shore Diving Here?
While Tenerife offers some accessible shore dives, the true gems of the southern coast are almost exclusively reached by boat. Opting for a boat-based itinerary is not just a matter of convenience; it is a strategic decision that unlocks a higher tier of diving experiences. The volcanic topography, with its sheer cliffs and rugged coastline, makes many of the most dramatic walls and offshore reefs physically impossible to access from the land. This geographical barrier is the first reason why boat diving is fundamentally superior here.
Beyond simple access, boat diving provides a significant upgrade in both safety and dive quality. The key advantages are clear:
- Access to Premier, Inaccessible Sites: Boats are the only way to reach pristine offshore reefs and dramatic drop-offs that are the signature of Tenerife’s underwater world.
- Enhanced Safety Provisions: Reputable dive boats are equipped with critical safety equipment like emergency oxygen, comprehensive first-aid kits, and marine radios for immediate communication, a level of security shore diving cannot match.
- Reduced Physical Exertion: One of the most underrated benefits is energy conservation. Boat diving eliminates long, gear-laden walks across hot sand and exhausting surface swims to the drop-off point. You enter the water directly over the site, saving all your energy and air for the dive itself.
- Drift Diving Capability: Boats make it possible to perform exhilarating drift dives along walls and current-swept channels. The boat follows your surface marker buoy, allowing you to cover significant ground and see more of the environment without the need to swim back to a fixed entry point.
Ultimately, choosing boat diving is choosing efficiency and quality. It means less time spent on strenuous logistics and more time experiencing the very best, most remote, and safest underwater environments the island has to offer. For a time-limited one-week trip, this efficiency is paramount.
How to Sequence Your Dives from Easy Reefs to Deep Drop-Offs?
A common mistake divers make on holiday is diving randomly, choosing sites based on what sounds interesting each day. A strategic planner, however, structures the week with progressive depth sequencing. This means starting your week with shallower dives and gradually moving to deeper sites as the days go on. This approach isn’t just about “warming up”; it’s a proven method for enhancing safety and acclimatization.
This principle is so effective that it’s formally adopted in scientific diving programs. For instance, some leading university marine science departments enforce a structured protocol where divers must complete a set number of supervised dives at one depth before being cleared for the next increment. An evidence-based approach in scientific diving requires divers to demonstrate mastery and knowledge of deep-diving challenges before progressing. While you aren’t in a formal training program, adopting this mindset—proving comfort at 18m before tackling 30m—is a mark of a smart, safe diver.
For your one-week trip, this translates into a simple plan: schedule your dives on shallower “garden” reefs (15-18m) for the first day or two. This allows your body to acclimatize, gives you a chance to check your weighting and gear in a forgiving environment, and builds confidence. From day three onwards, you can then comfortably and safely progress to the deeper walls and drop-offs (25-30m). This progressive sequencing minimizes physiological stress and ensures you are at your sharpest for the more demanding deep dives later in the week.
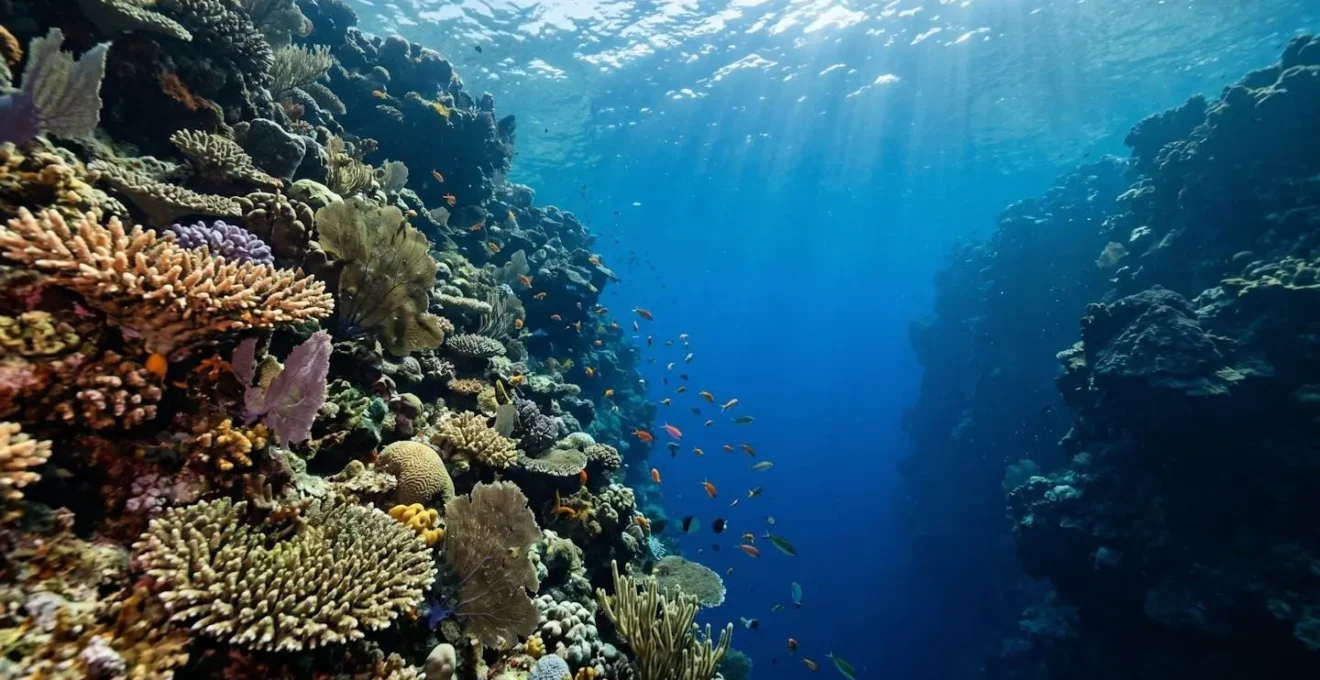
Deep Walls vs Shallow Gardens: Which Sites Suit Your Experience Level?
Tenerife’s dive sites can be broadly categorized into two types: shallow volcanic “gardens” and deep, dramatic “walls.” Choosing between them isn’t about which is “better,” but which is best suited to your current experience level and what you want to achieve during your dive. Mis-matching your skills to the site is a recipe for a stressful, and potentially unsafe, experience. An Open Water diver with 10 dives will have a fantastic time exploring a vibrant 18-meter reef, but may feel overwhelmed and task-loaded on a 30-meter wall.
Understanding the specific demands of each environment is key to making the right choice. Shallow gardens are perfect for practicing skills and enjoying long bottom times, while deep walls require precise buoyancy and air management. As this comparative analysis shows, the required skills are distinctly different.
| Dive Site Type | Ideal Experience Level | Key Skills Required | Primary Challenges | Best For |
|---|---|---|---|---|
| Shallow Gardens (15-18m) | Open Water Diver+ | Basic buoyancy control, surge management, finning technique | Strong surge conditions, navigation in low visibility, wave action | Macro photography, extended bottom time, skill practice |
| Deep Walls (25-30m) | Advanced Open Water+ | Stable hover control (60+ seconds), nitrogen narcosis awareness, decompression planning | Depth monitoring, air consumption management, precise buoyancy near vertical surfaces | Buoyancy training, deep dive procedures, dramatic topography exploration |
For a one-week trip, a great strategy is to use both. Start with the shallow gardens to refine your buoyancy control and get comfortable. This is also where you’ll often find abundant macro life like nudibranchs and octopus. Once you feel confident, progress to a deep wall. The feeling of hovering effortlessly in the blue next to a vertical drop-off is an incredible experience, but it’s one that is best enjoyed when you’re not worried about your fundamental skills. This calibrated approach ensures every dive is a pleasure, not a test.
The Risk of Visiting Top Sites at 10 AM During High Season
One of the biggest mistakes a visiting diver can make during high season (July-August) is showing up at a premier dive site at 10 AM. This is the “rush hour” of the diving world. Most dive centers operate on a similar schedule, and by mid-morning, popular sites can become crowded, reducing visibility with kicked-up silt and diminishing the feeling of tranquil exploration. The chance of a peaceful encounter with marine life plummets when it’s being observed by multiple groups simultaneously.
Experienced local operators have long understood this problem and employ a simple but highly effective counter-strategy: strategic scheduling. To combat overcrowding and enhance the diver experience, the best centers intentionally plan their trips outside of these peak hours. The most effective tactic, according to dive operators managing high-season crowds, is to schedule early morning departures. Getting out on the water and into your first dive before 8:00 or 9:00 AM means you arrive at the site when it’s pristine, quiet, and yours to explore. You get the best conditions and the most natural marine life encounters.
When booking your dives, don’t just ask “which sites are we going to?” Ask “what time do we depart?” A dive center that offers early morning departures is a strong indicator of a quality, experience-focused operation. They understand that the timing of a dive is just as important as the location. Choosing an early boat allows you to finish your first dive just as the crowds are arriving, giving you a completely different and superior experience. For a one-week trip where every dive counts, avoiding the 10 AM rush is a non-negotiable part of a well-planned itinerary.
How to Rotate Morning and Afternoon Dives to Maximize Site Variety?
With only a week, you’ll likely be doing two dives a day to see as much as possible. Simply doing two random dives isn’t a strategy; it’s a gamble. A well-planned day involves rotating your morning and afternoon dives based on a clear set of principles that balance safety, logistics, and the type of experience you’re looking for. This ensures you’re not just diving more, but diving smarter.
The first rule is an unbreakable one in recreational diving: always do your deepest dive first. In the morning, your body has the lowest residual nitrogen load, making it the safest time to explore a deeper wall or wreck. The afternoon dive should then be significantly shallower. This deep-first principle is the cornerstone of safe, multi-dive day planning. Beyond that, you can optimize your day by thinking about geography and even marine life behavior patterns.
Pairing a demanding deep dive with a relaxed, shallow reef dive in the afternoon helps manage mental and physical fatigue, keeping you fresh for the entire week. By applying a consistent daily strategy, you create a rhythm that maximizes both your safety and the variety of sites you can enjoy without feeling exhausted or rushed.
Your Daily Dive Rotation Checklist: 5 Strategic Principles
- Apply the Deep First Rule: Always conduct your deepest dive in the morning to minimize decompression sickness risk, as your body has the lowest nitrogen load.
- Pair Dives Geographically: Plan your morning and afternoon dives in the same geographical area to reduce boat travel time and increase underwater or relaxation time.
- Ensure Safety Stop Compliance: Make a safety stop at 5 meters/15 feet for at least three minutes after every single dive, but be especially diligent after deeper morning dives.
- Time for Marine Behavior: Schedule dives based on animal activity. For example, some predators may be more active in the morning, while certain cleaning stations are more reliably busy in the afternoon.
- Balance the Task Load: Pair a logistically or mentally demanding dive (like a deep wreck requiring focus) with a relaxed, shallow reef dive to manage fatigue throughout the day.
6-Dive Pack vs Unlimited Diving: Which Offers Better Value for You?
Dive centers typically offer two main pricing structures: a set package of dives (e.g., a 6-dive or 10-dive pack) or an “unlimited diving” option for a set period. Choosing the right one is a key part of optimizing your budget. The “unlimited” option can sound tempting, promising endless underwater time, but it’s not always the best value. The decision should be based on a realistic assessment of your diving style and energy levels.
A typical 6-dive package allows for two dives a day for three days, leaving other days free for relaxation or other activities. This is often a perfect fit for a relaxed holiday pace. An unlimited package, on the other hand, only becomes financially advantageous if you plan to do a high volume of dives. The financial tipping point is crucial; for many resorts, the breakeven point is around 8 to 9 dives in a 5-day period. If you are a high-energy diver who genuinely plans to do at least two dives every single day, and maybe even a night dive, then “unlimited” can offer excellent value.
However, be honest with yourself. Many divers overestimate their stamina. The excitement of the first few days can give way to fatigue. You also need to factor in a mandatory no-fly period of at least 18-24 hours before your departure flight, which means no diving on your last day. If you buy an unlimited 7-day package but can only dive for 5.5 days, and end up only doing 7 dives due to fatigue, you will have overpaid. For most divers on a one-week holiday, a 6 or 8-dive package offers a better balance of value and flexibility.
RIBs vs Hard Boats: Which Vessel Suits Your Comfort Level?
The type of boat you dive from significantly impacts your overall experience, from the journey to the site to the comfort of your surface interval. In Tenerife, you’ll primarily encounter two types: Rigid Inflatable Boats (RIBs) and larger, traditional “hard boats.” Neither is objectively better; they simply serve different needs. Aligning the boat type with your personal comfort level, gear, and dive plan is a detail a savvy planner never overlooks.
RIBs are the speedboats of the diving world. They are fast and maneuverable, able to reach remote sites quickly and get into tight spots that larger boats can’t. However, this speed comes at the cost of comfort. They offer limited space, minimal shade, and can be a bumpy ride in anything but the calmest seas. Entry is typically a “back-roll,” which can be disorienting for new divers. In contrast, hard boats are slower and more stable. They are floating dive platforms, offering spacious decks, shaded areas, toilets, and often refreshments. Entry is usually a “giant stride” from a stable platform, which is easier for divers with mobility concerns or heavy camera equipment.
The choice depends entirely on your priorities. If you are an experienced diver focused on maximizing the number of sites in a day and don’t mind a more rugged experience, the efficiency of a RIB is ideal. If you are a photographer with a large camera rig, prone to seasickness, or simply value a relaxed social experience between dives, the stability and amenities of a hard boat are far superior.
| Feature | RIBs (Rigid Inflatable Boats) | Hard Boats |
|---|---|---|
| Speed & Maneuverability | Fast transit times, access to tight spots and remote locations | Slower but stable passage |
| Space & Stability | Cramped, less stable in rough seas | Spacious deck, high stability, comfortable in varied conditions |
| Amenities | Minimal – no toilet, limited shade, basic seating | Toilet, fresh water rinse stations, shaded cabin, refreshment areas |
| Surface Interval Quality | Sun-exposed wait, limited space to relax or debrief | Comfortable social hour with space for gear, snacks, debriefing |
| Entry Method | Back-roll entry (can be disorienting) | Giant stride from platform (controlled, easier for mobility issues) |
| Best For | Thrill-seekers, experienced divers, quick site-hopping | Photographers with camera rigs, families, divers prone to seasickness, those with heavy gear (twinsets) |
Key takeaways
- Strategic sequencing is more important than the specific sites chosen; progress from shallow to deep throughout your week.
- Timing is everything: schedule early morning dives to beat the crowds and always rotate depths for safety on multi-dive days.
- True value is not just price: align packages, boats, and site types with your personal dive style, experience level, and budget.
Planning a Tenerife Dive Trip: How to Budget for a 1-Week Stay in High Season?
A successful dive trip requires a realistic budget that goes beyond the headline price of a dive package. During high season in a popular destination like Tenerife, various “hidden” costs can add up quickly if not anticipated. A good planner accounts for everything from equipment rental and surcharges to the mandatory non-diving day before flying home. Breaking down the costs systematically is the only way to avoid unpleasant surprises.
Your primary expense will be the dive package itself, but equipment rental is a significant secondary cost if you’re not bringing your own. While bringing your own gear can save money on a longer trip, you must weigh rental fees against airline baggage charges. If an extra bag costs $120 round-trip, renting locally for 5-6 days at around $30/day might be a comparable expense with far less hassle. Remember that a full set of personal gear represents an investment of at least $1,000 when factoring in essential items, so renting can be a smart choice for many.
Beyond the main costs, be sure to account for the small but important extras. These incidentals are where budgets often fail. A comprehensive budget for a one-week trip should include:
- Core Dive Costs: A 6-dive package will typically run from $350-500. Full equipment rental will add approximately $150-180 for the week.
- Dive Surcharges: Factor in potential extras like mandatory dive computer rental ($5-10/day), Nitrox fills ($5-10/tank), marine park fees ($5-15/dive), and fuel supplements for distant sites ($10-20).
- Crew Gratuity: It’s customary to tip the boat crew and dive guides. Budget 10-15% of your total dive cost for tips.
- Surface Interval Day: You cannot dive for 24 hours before your flight. Budget $50-100 for a non-diving activity on your last day, such as exploring Mount Teide or a local winery.
- Enhanced Nutrition: Diving is physically demanding. Budget an extra $10-15 per day for increased water, electrolyte drinks, and protein-rich meals to maintain your energy levels.
By building these categories into your plan, you create a robust and realistic budget. This foresight ensures that you can relax and enjoy your trip, knowing that all financial aspects have been thoughtfully considered.
Now that you have the strategic framework, the next logical step is to start contacting dive centers in southern Tenerife. Use these principles as your guide to ask the right questions and build the perfect, bespoke itinerary for your underwater adventure.